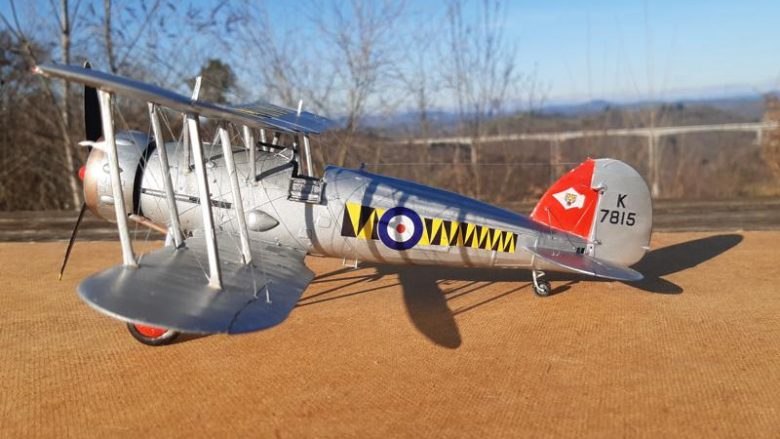
-Comment obtenir ceci :
-How to get this:

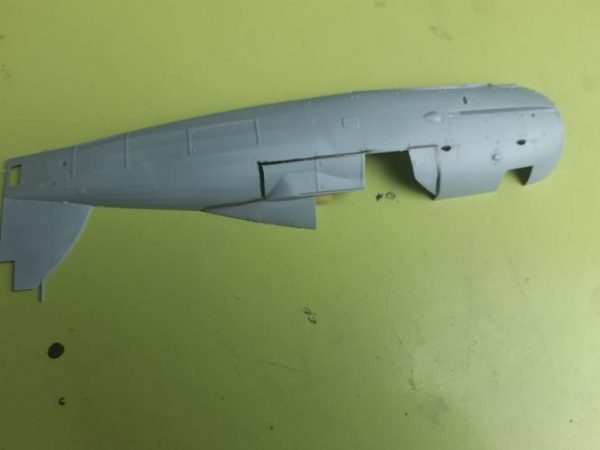
A partir de cela :
From this point on:

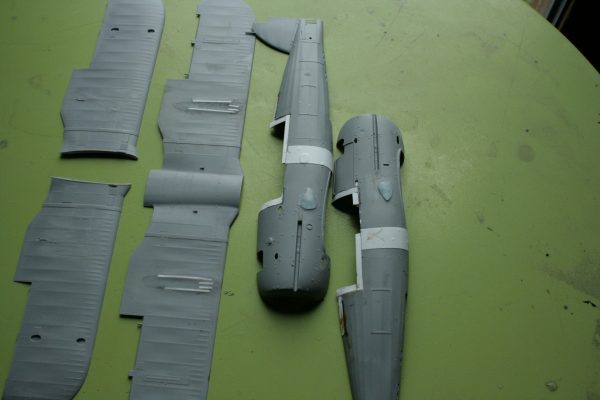
-Pour ce faire j’ai utilisé deux kits de Gladiator au 32 de chez I.C.M dont vous avez pu voir les photos du premier au couleurs Finlandaise, comme celui de la photo, dans une des news de Campi .
-C’est tout simple…, enfin,…. à première vue …..Il suffit juste d’éliminer le dos de chameau et sa verrière, re-créer un dos plat avec un nouveau pare-brise, changer le train d’atterrissage, ajouter un mat d’entretoise supplémentaire sur chaque ailes, donc 4 en tout, avec le haubanage qui va avec, modifier quelques petites bricoles en supprimer une ou deux autres, et voilà……
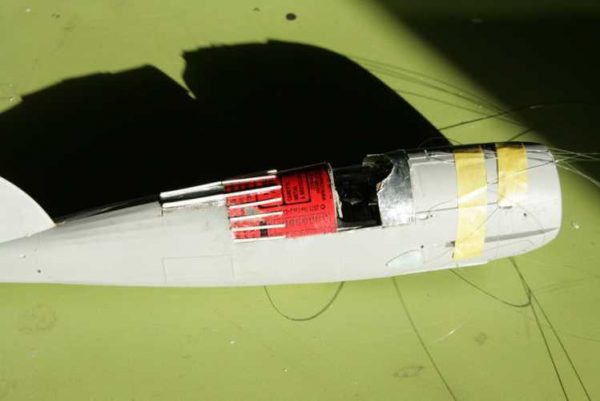
La principale modification qui caractérise le Gauntlet est la réalisation du dos du fuselage.Il faut éliminer la bosse et la remplacer par un dos profilé
-To do this I used two kits of Gladiator at 32 of I.C.M from which you could see the photos of the first in Finnish colors, like that of the photo, in one of the news of Campi .
-It’s quite simple…, well,…. at first sight ….. Just eliminate the camel back and its canopy, re-create a flat back with a new windshield, change the landing gear, add an extra spacer mat on each wing, so 4 in all, with the strut that goes with it, change a few little things to remove one or two others, and here we go…
The main modification that characterizes the Gauntlet is the realization of the back of the fuselage. The bump must be removed and replaced with a profiled back
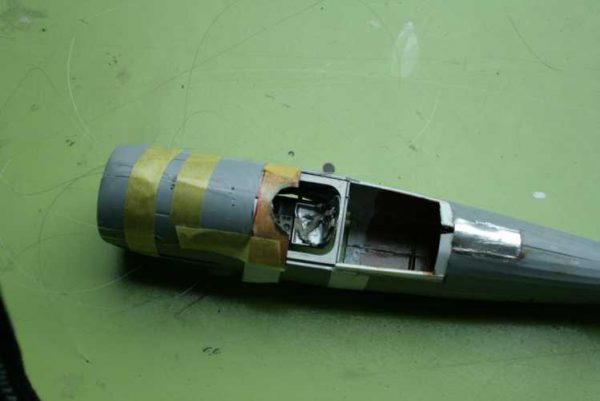
–La première erreur que j’ai commise a été de conserver une partie du rainurage du kit d’origine ,j’aurais du tout supprimer jusqu’au pied de dérive. Le dos et la partie devant le cockpit ont ensuite été reconstitués en peau de boite de bière et profilé “evergreen,” après avoir installé l’intérieur du poste de pilotage par en dessous grâce à la bonne conception du kit de base. J’ai utilisé les éléments du Gladiator car vu l’époque la différence entre les deux appareils ne devait pas être bien grande. A noter également le pré-positionnement des fils de haubans en prévision de leur installation future
–The first mistake I made was to keep some of the grooving from the original kit, I should have removed it all to the drift foot. The back and the part in front of the cockpit were then reconstituted into a beer can skin and “evergreen” profile after installing the cockpit interior from below thanks to the good design of the basic kit. I used the elements of the Gladiator because at the time the difference between the two aircraft was not much. Also note the pre-positioning of the guy wires for future installation
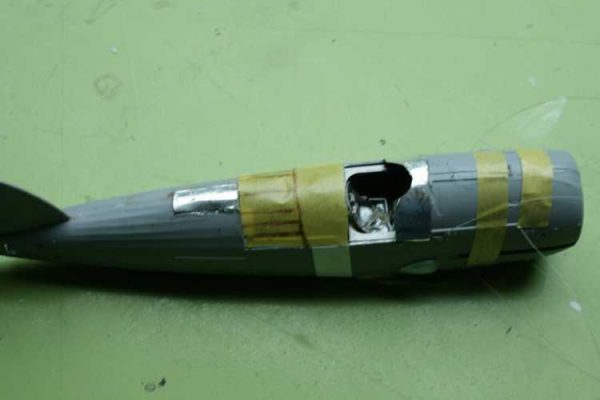
Une des difficultés a été de respecter l’angle convergeant des nervures du cockpit à la dérive en assurant une jonction entre les nouvelles et celles du kit. Après plusieurs tentatives montage/démontage j’ai du me résoudre à l’installation la moins pire résultant du choix fait au départ.
One of the difficulties was to respect the converging angle of the drifting cockpit ribs by ensuring a junction between the new ones and those of the kit. After several attempts assembly/disassembly I had to resolve myself to the least worst installation resulting from the choice made at the beginning.

La différence entre les nervures reconstruite et celles du kit est nettement visible ce qui rend toute présentation à quelque concours illusoire. Même après l’avoir recouvert d’une feuille d’alu adhésif.
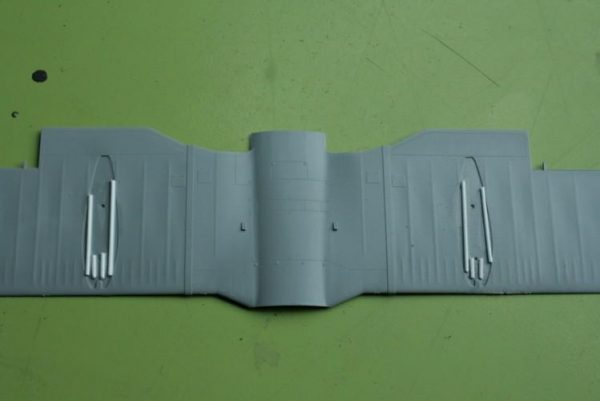
Sur et sous les ailes inferieures, il a fallu supprimer l’emplacement des canons et de leurs trappes d’accès par un colmatage au goop (mélange de diluant cellulosique et plastique fondu) et ponçage.
The difference between the reconstructed ribs and those of the kit is clearly visible which makes any presentation to some contest illusory. Even after covering it with an adhesive foil.
On and under the lower wings, it was necessary to remove the location of the cannons and their access hatches by a goop clogging (mixture of cellulosic thinner and molten plastic) and sanding.
A noter le renflement de la culasse de la mitrailleuse obtenue par surmoulage en résine translucide d un kit de super détail. A ce stade de la photo, le dos du fuselage n était pas installé, les bandes d “evergreen” blanches sont posées en prévision de servir de support au revêtement en peau de boite de bière
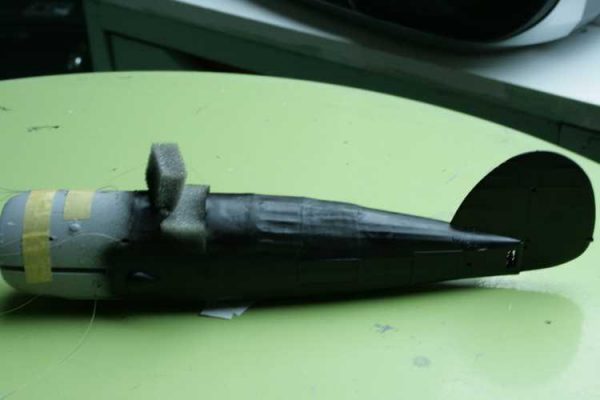
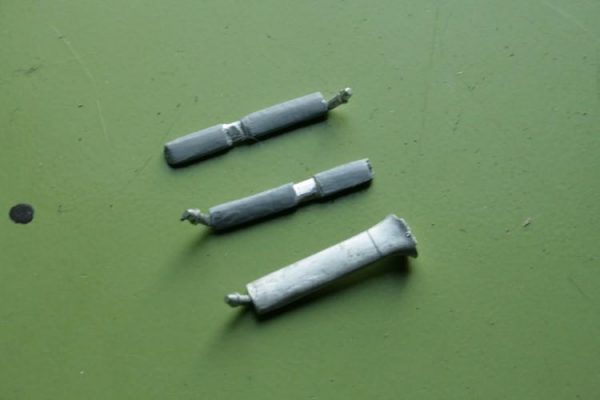
Autre point important dans la modification, le train d’atterrissage obtenu par l’utilisation de profilé, une mise en forme du train principal du “Gladiator” en white métal, à la Dremel, et le secours de la boite rabiot. Noter l’omniprésence des fils de haubanage. Cette opération étant de loin la plus délicate et ennuyeuse à réaliser sur toute construction de bi-plans, il convient de l’anticiper dans toutes les phases de montage
Note the bulge of the bolt of the machine gun obtained by overmoulding in translucent resin of a kit of super detail. At this point in the photo, the back of the fuselage was not installed, the white “evergreen” strips are installed in order to serve as a support for the cover in beer box skin
Another important point in the modification, the landing gear obtained by the use of profile, a shaping of the main gear of the white metal “Gladiator” at the Dremel, and the rescue of the box rabiot. Note the omnipresence of guying wires. Since this operation is by far the most delicate and boring to carry out on any construction of bi-planes, it is necessary to anticipate it in all phases of assembly
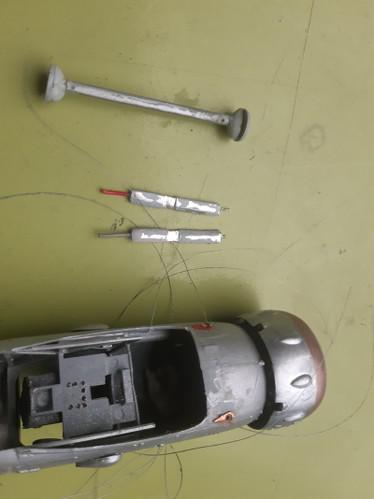
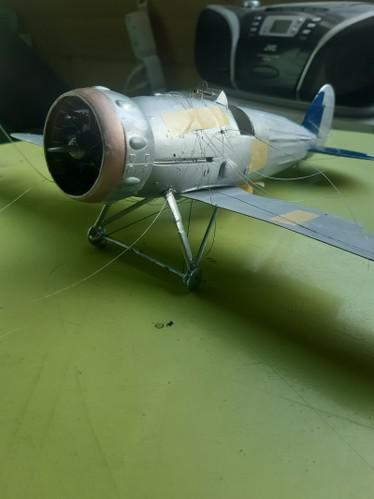
Enfin la bête est sur ses pattes; au passage notez que le haubanage des jambes de train a été réalisé a l’aide de fil de couturière ainsi que le pare-brise et les organes de visée
Finally the beast is on its feet; by the way note that the struts of the train were made with the help of seamstress’s wire as well as the windscreen and sights
 à suivre:
to be continued
Topo, photos et montage: Mr Jean Michel CHRISTIAN